Before you start
To connect Contenta AI with WordPress, you’ll need a WordPress Application Password. This allows secure access to your site without sharing your main account password.Get a WordPress Application Password
1
Go to your WordPress Dashboard
Log in to your WordPress admin panel.
2
Open your profile settings
Navigate to Users → Profile (or Users → Your Profile).
3
Find Application Passwords
Scroll down to the Application Passwords section.
4
Enter an application name
Add a name (e.g. Contenta AI) to identify this connection.
5
Generate the password
Click Add Application Password to create a new password.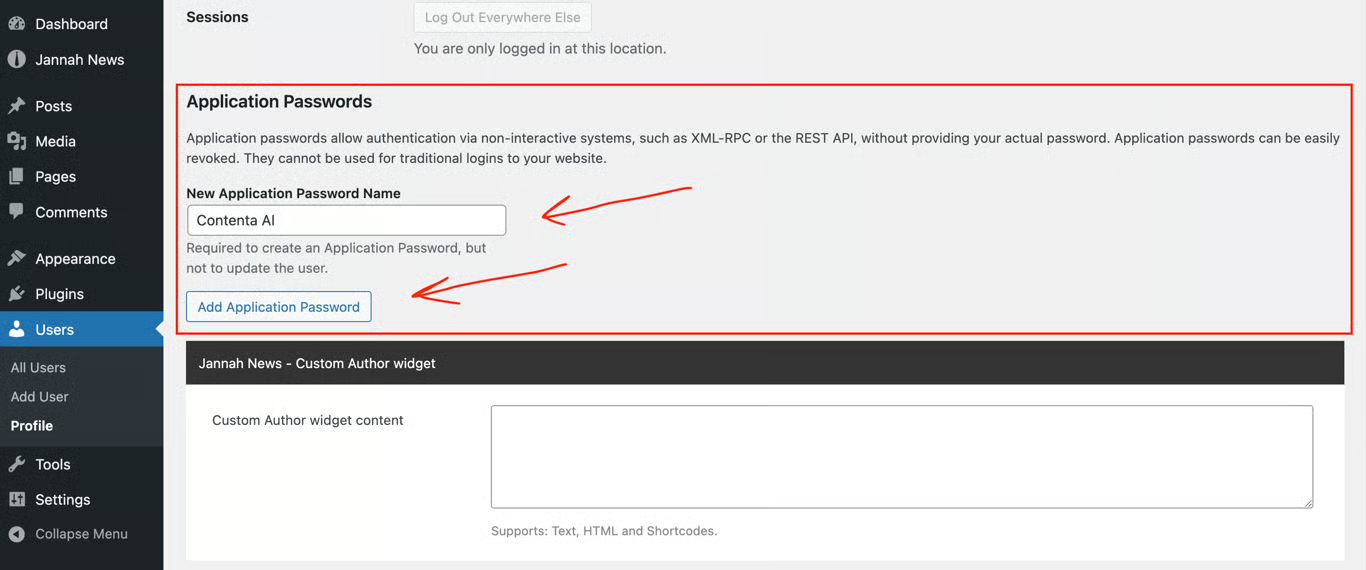
6
Save your password
Copy and store the generated password in a safe place - it will only be shown once.
Make sure the WordPress user you generate the Application Password for has permission to create and publish posts. Users with the Author, Editor, or Administrator role can do this by default.
Connect WordPress in Contenta AI
Once you have your Application Password, go to the Integrations page to connect your WordPress site.1
Go to Integrations
In Contenta AI, navigate to the Integrations page from the main menu.
2
Find WordPress
Locate WordPress under the Content Management section and click Connect Now.
3
Open connection window
A connection window will open where you can enter your WordPress details.
4
Enter your website details
Provide your Site URL, WordPress username, and Application Password.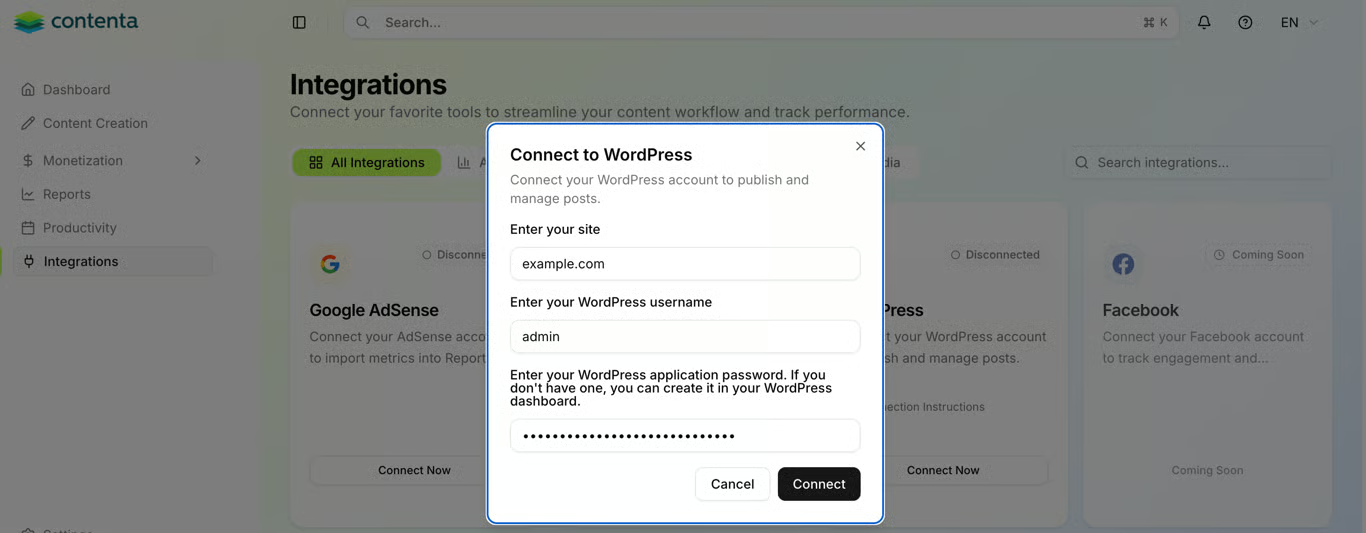
5
Click Connect
Once all fields are filled in, click Connect to complete the setup.
6
Start publishing
After connecting, your status will show Connected, and you can publish content directly to your WordPress site.
Have a question not covered here? Email the Contenta AI support team at support@contenta.ai